This tutorial will help you to get started in using TheMaker. Video Tutorials are available on the video page.
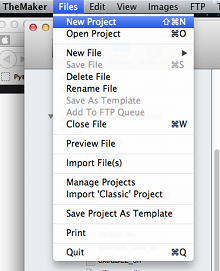
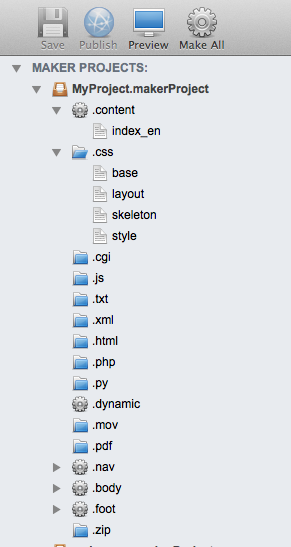
In TheMaker files are organized by their extensions. You can save, preview, create, import and delete any of these. Here are just a few examples.
These are your actual HTML documents or at least a part of them. The .content File is part of the HTML documents <body>. It contains the information that is displayed in the webbrowser.
You noticed the _en at the end of the filename. This is indicating that you are working on the english side of your project. TheMaker is also supporting additional languages for projects. To add a language go to Tools / Project Languages / Add Language.
Your projects stylesheets, where the projects design is stored. A Maker project usually has the default stylesheed called main.
This is for dynamic content. This unique for TheMaker.
<maker_dynamic:weekly_top_ten />
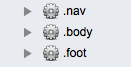 In TheMaker each HTML document is split up in five "parts". "part files" are clearly indicated in the file tree with a little gear symbol. There are five types of parts.
.head - this is where all the meta data goes, stylesheet imports and so on
.body - this is actually the top of your page, your logo and tagline for example
.nav - your projects navigation
.content - the pages content, stored in .content files
.foot - your projects foot at the bottom of each page.
.body, navigation, and foot are global wich means they are the same for all the pages. After you have changed one of these "part files" all the projects pages will be rebuilt.
To edit your pages .head go to Tools > edit .head. This might all seem a little odd at first but after you worked on our project for a while you will get used to it.
To find our more, you can preview our file in a browser by pressing the preview button. Then view the source of the built document. In the soucecode you will find comments, indicating where each part ends.
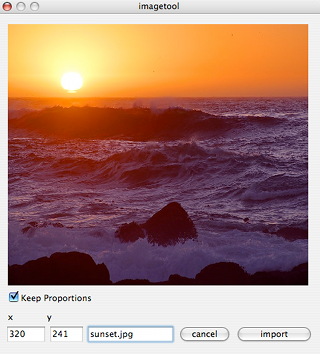
To insert the image go to the desired position in your HTML code and select HTML/CSS > Images And Objects > Image .
To delete an image from your system and your server go to Images > Delete Image. To sync images between your system and your server go to Images > Sync Images.
To link to an image you should do it like this: <img src="image.jpg" /> This is also working inside of stylesheets.
To link to a website you do: <a href="about_en.htm" /> the about page </a>
You can also use parameters: <a href="about_en.htm?name=theMaker" />
If you publish the page, TheMaker does update the link information with the data from the distribution table and is replacing it with the location of the referenced file on the server. This gives you full control over links in your project.
For exaple: image.jpg will be replaced by http://www.makercms.org/gfx/image.jpg
Also, when you use links in that way, once you rename a file inside TheMaker, all it's references will be updated across the whole project.
Starting with version 1.5 of TheMaker it is possible to use Markdown from withing certain maker parts (.content, .foot, .body, .nav). To create a "Markdown area" go to Insert / Markdown or use the keyboard shortcut Ctrl+Shift+m.
Example:
<markdown>


# This is a markdown heading.


This is a paragraph...


</markdown>
Here you can find out more about the Markdown syntax.
maker markers are a new feature in the 0.7 version. To use them go to the Insert > Maker Markers and choose one of the available markers. They look somewhat like this !makerMarker! . The following markers are available:
			projectName

			pageName

			creationDate

			todaysDate
Don't forget to surround them with the ! ! signs.
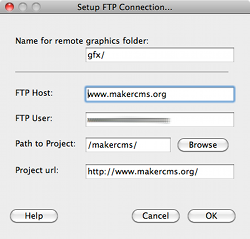
Your FTP Host. Usually something like www.myhost.com or ftp.myhost.com .
Your FTP Username.
A name for the folder your images will be stored. This value cannot be empty! Please note that this is only a NAME not a PATH.
If you want to put your project on a webspace that is already used for another website then this will be the "root" directory for your new project.
For example:
In the case of http://www.myfirst.com/mysecond/you would enter
mysecond here.
Click on the browse button to check out your server and to choose a directory. You may also create one. Make shure that when you finally hit OK that all settings are correct. Otherwise existing files on your server will be corrupted.
Something like: (http://www.myproject.com) and (!) the Path to your project. Example:http://www.myproject.com/makertest/
All of your projects files are stored on your computer. If you publish them to your webserver you need to define where each file has to go.
This is done with the distribution table...
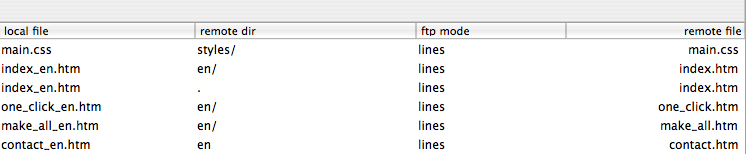
This is the filename on your computer. Notice that for .content files this is already the finished html file.
The remote directory where your file will be stored. Be shure what to put there. If you want to put your file to :
http://www.myserver.com/index.htm you can put a / here.
If you want to put your file to: http://www.myserver.com/otherProject/index.htm You need to use a . (dot) because / referes to the root directory.
Can be either lines or binary. The maker will set this automatically.
The name of the file on your server.
Actually, you can edit the "remote folder" and the remote file values, in case you want to move or reorganize files on your server. If you hit OK after making a change, TheMaker will apply these changes and reorganize your remote files. If there is a conflict in values, like to files having the same name, you will get a warning.
Files that have been edited or imported, are added to the FTP Queue. You can see how many files are in your queue in TheMaker's status bar on the bottom of the application window. If you want to publish the to the web, all you have to do is go to FTP > Publish or hit the publish button.
This will rebuild all your .content files at once.
The Maker supports multiple languages for projects. For example: (_en) for english.In the future it will be possible to add more languages. Some files are language specific. There are also .nav, .body and .foot files for each project language.
You may report a bug or give feedback by going to Help > Feedback. You can also send your feedback to info@makercms.org
If there is an error, you will get an error report. Please copy the error message to report a bug. You may report a bug by going to the Help > Bugreport.
The maker is being developed by Gerald Spreer and Ian Barrow. We would appreciate your feedback, suggestions and feature requests.
To run TheMaker from the sourcecode, via your Python interpreter, you will need: